Products on shelves
Product listing instruction video
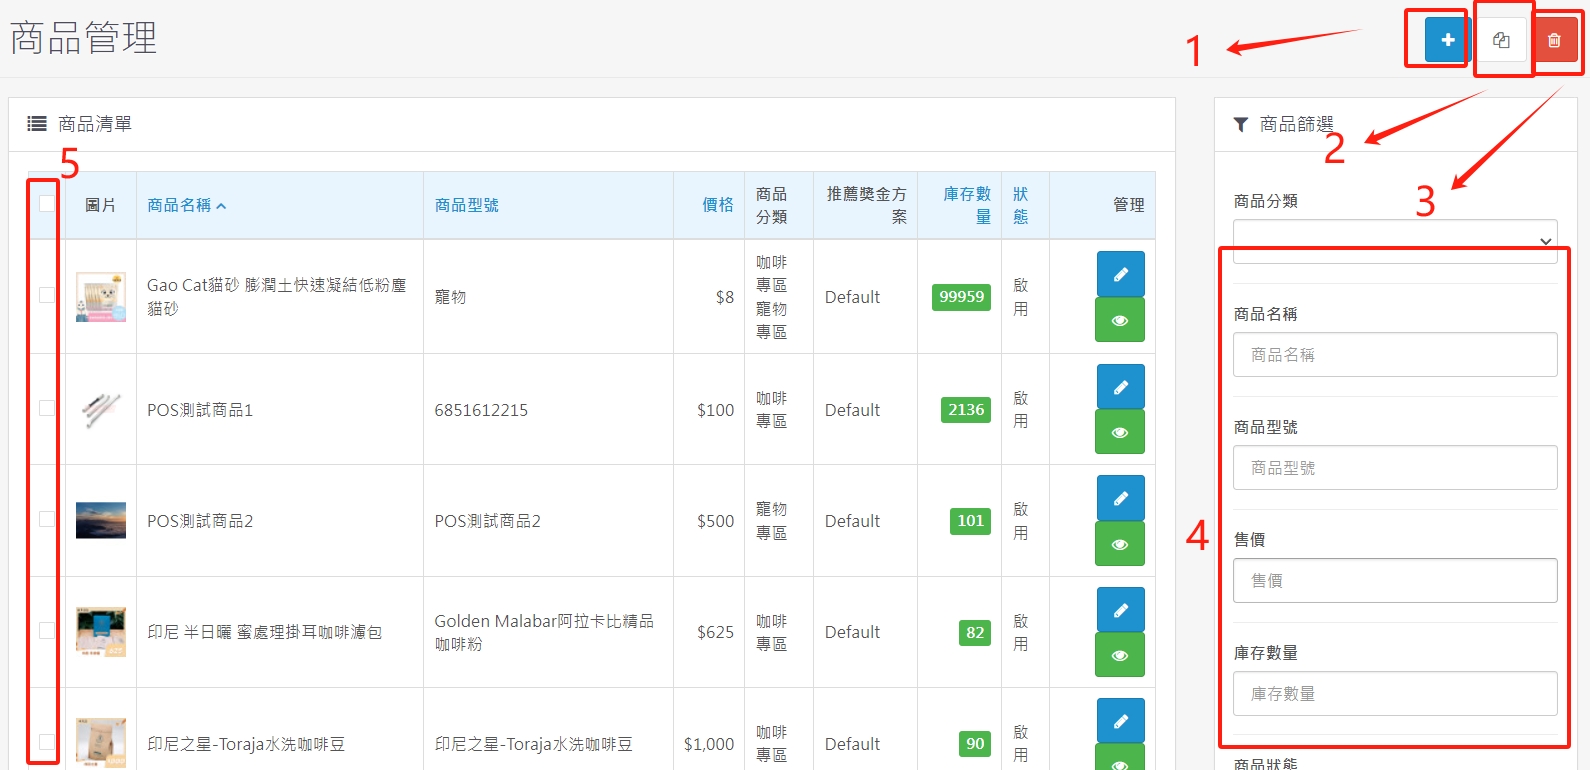
1. Product listing instructions
(1.1), new products
(1.2). Copy product - For products with the same settings, you only need to modify the image, name and description. You can check the product to be copied and click the copy button.
(1.3). Delete products - You can check the products to be deleted, and then press the delete button.
(1.4), product filtering - search for products according to set conditions.
(1.5), Check products - check multiple products you want to copy or delete.
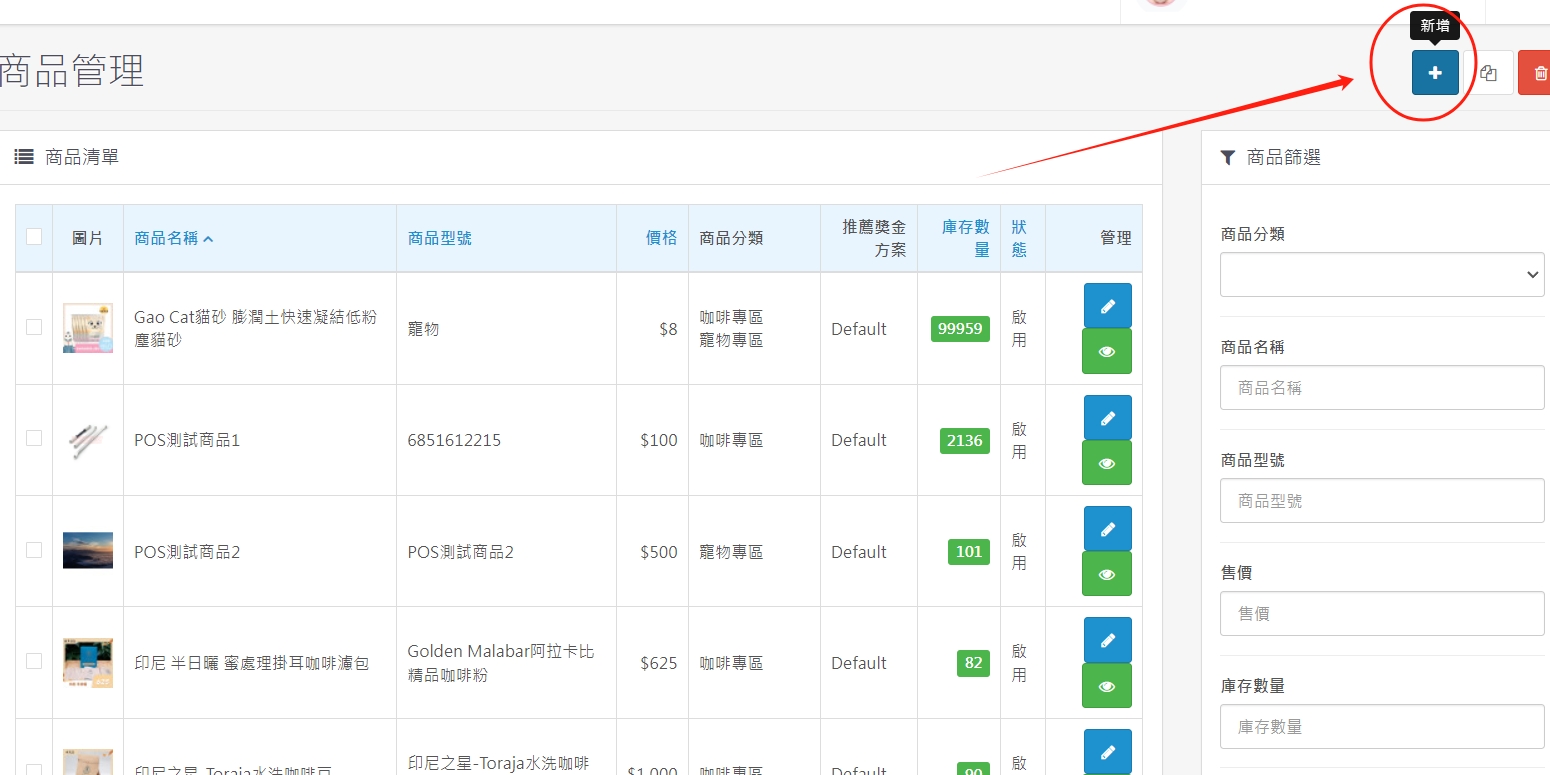
2. New product launch process
(2.1), click the + symbol in the upper right corner to start adding products
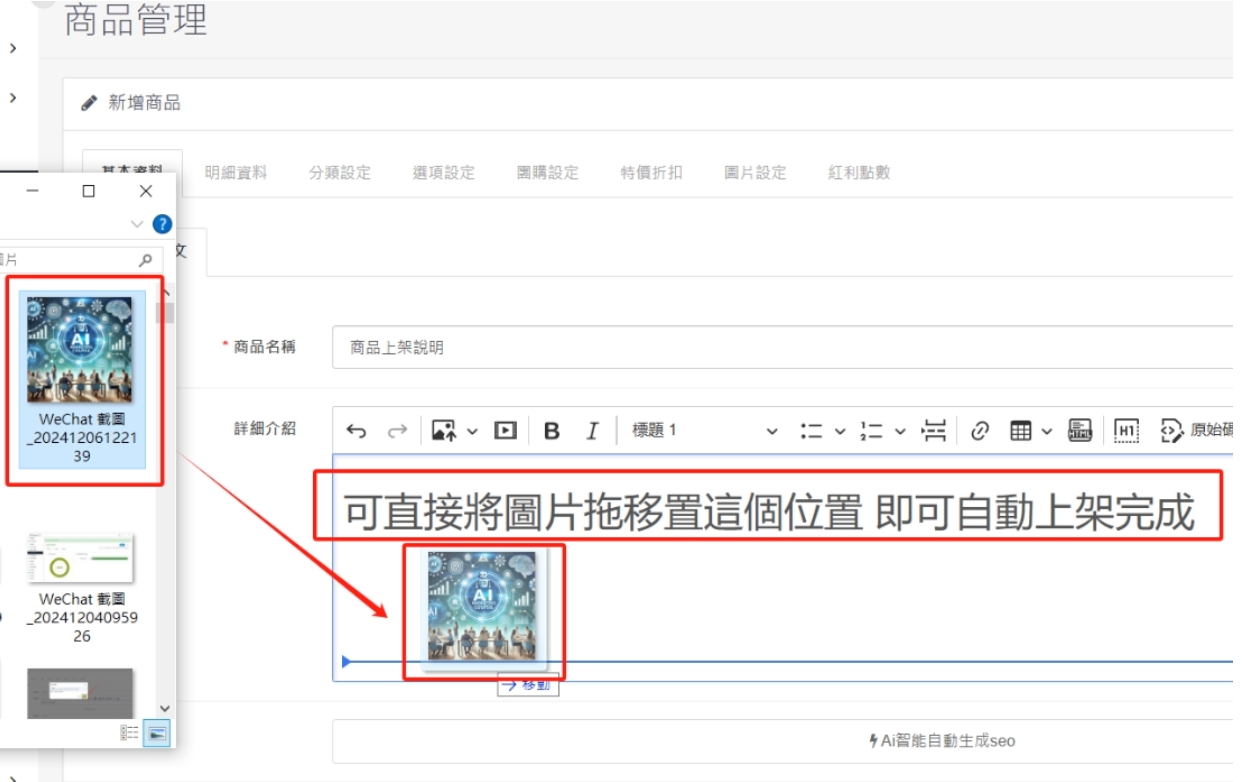
(2.2), product listing - basic information
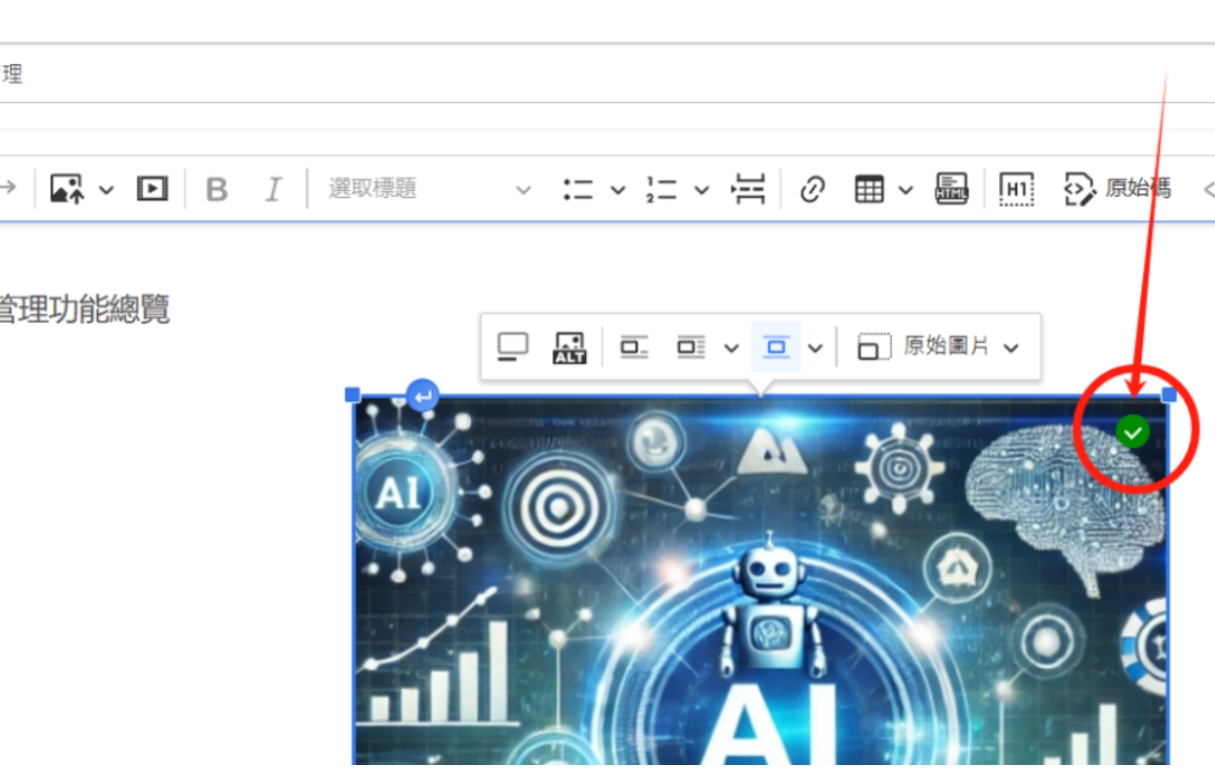
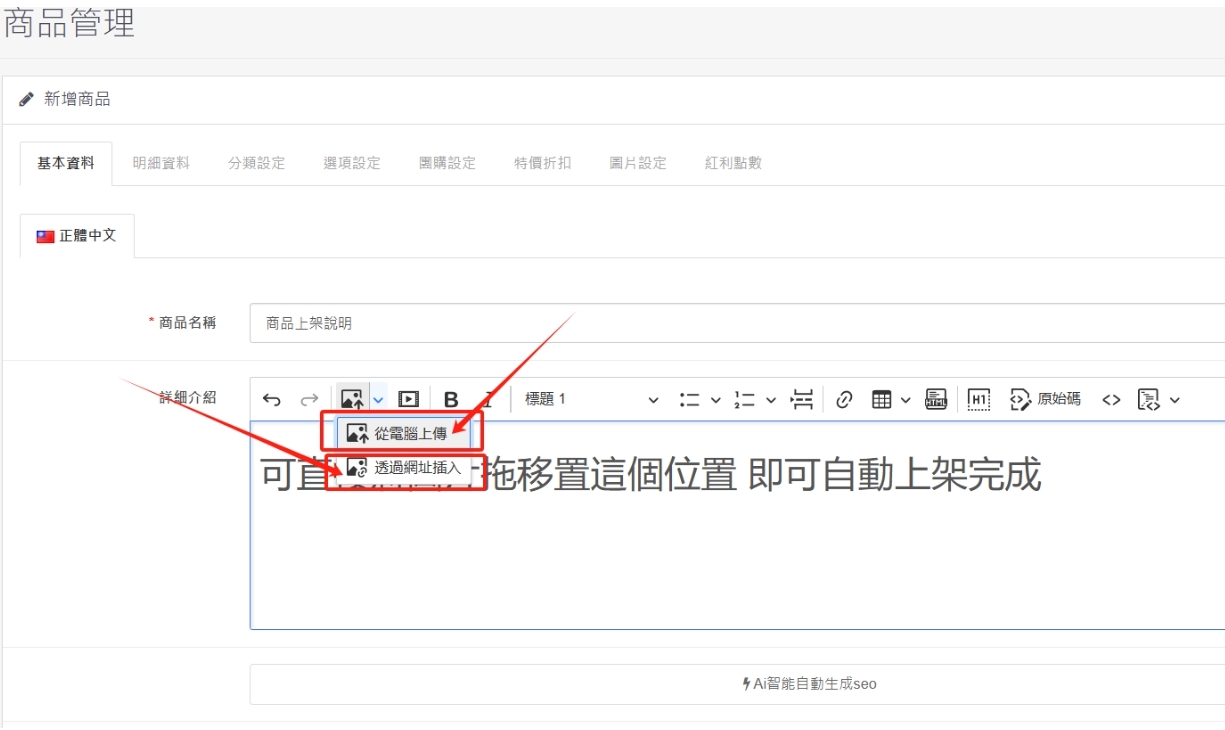
First set the basic information content editing, product name, detailed description editing, drag the image to the detailed introduction position to automatically complete the image upload, remind you! A green check mark in the upper right corner of the image will disappear, which means uploading the image is complete, and then you can press archive. The image size should be within 1MB so that the front-end opening speed will be faster.
(2.3). After clicking on the computer to upload, click on the image to be uploaded to complete the image upload. Click on the URL to insert the path to paste the Internet image, and the system will automatically present the image on your product page.
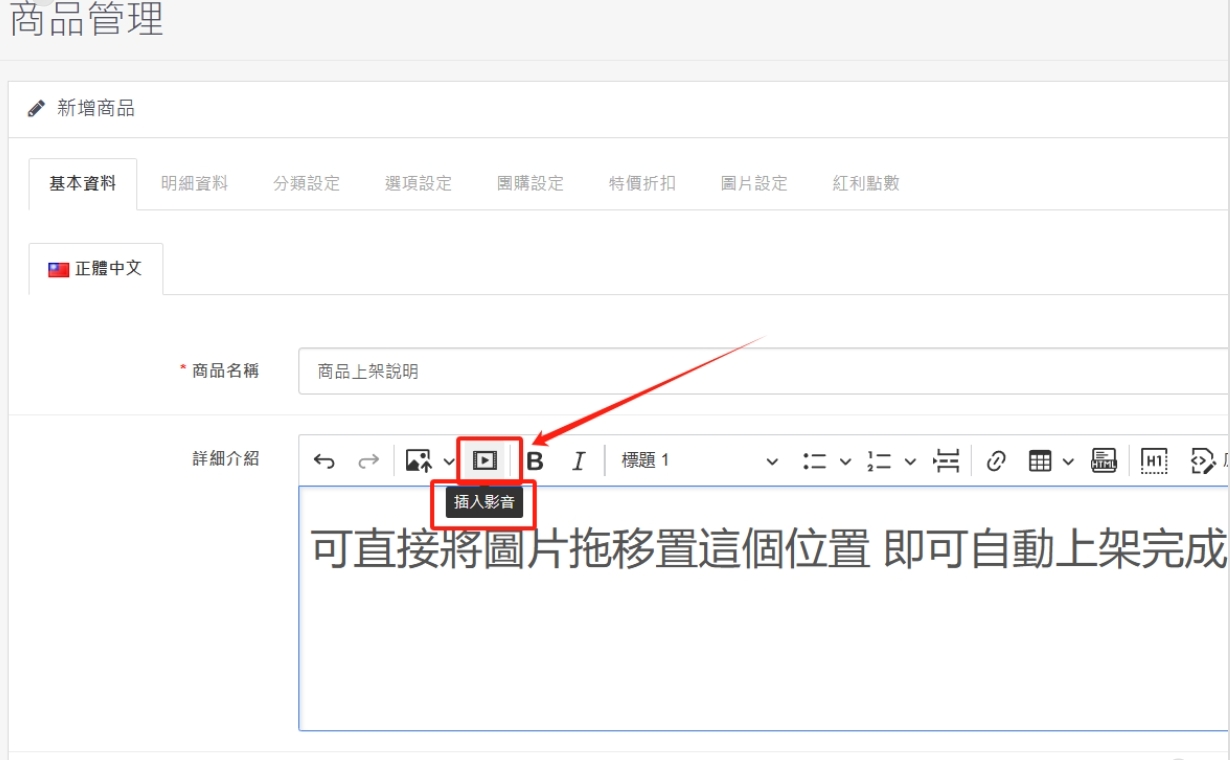
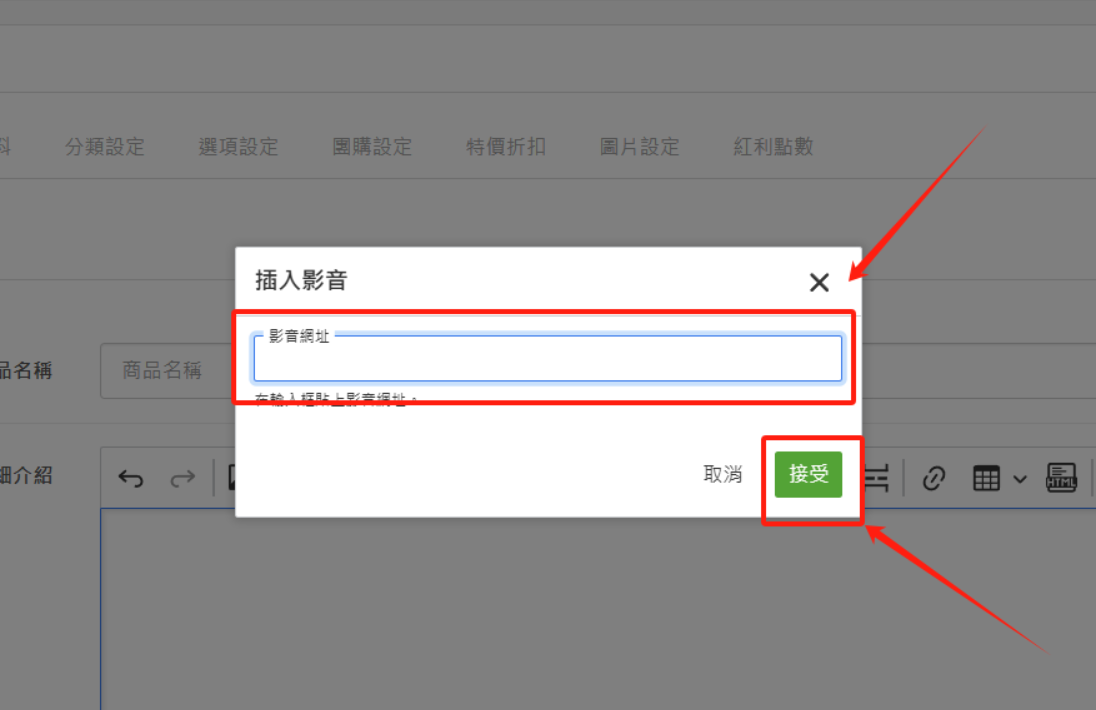
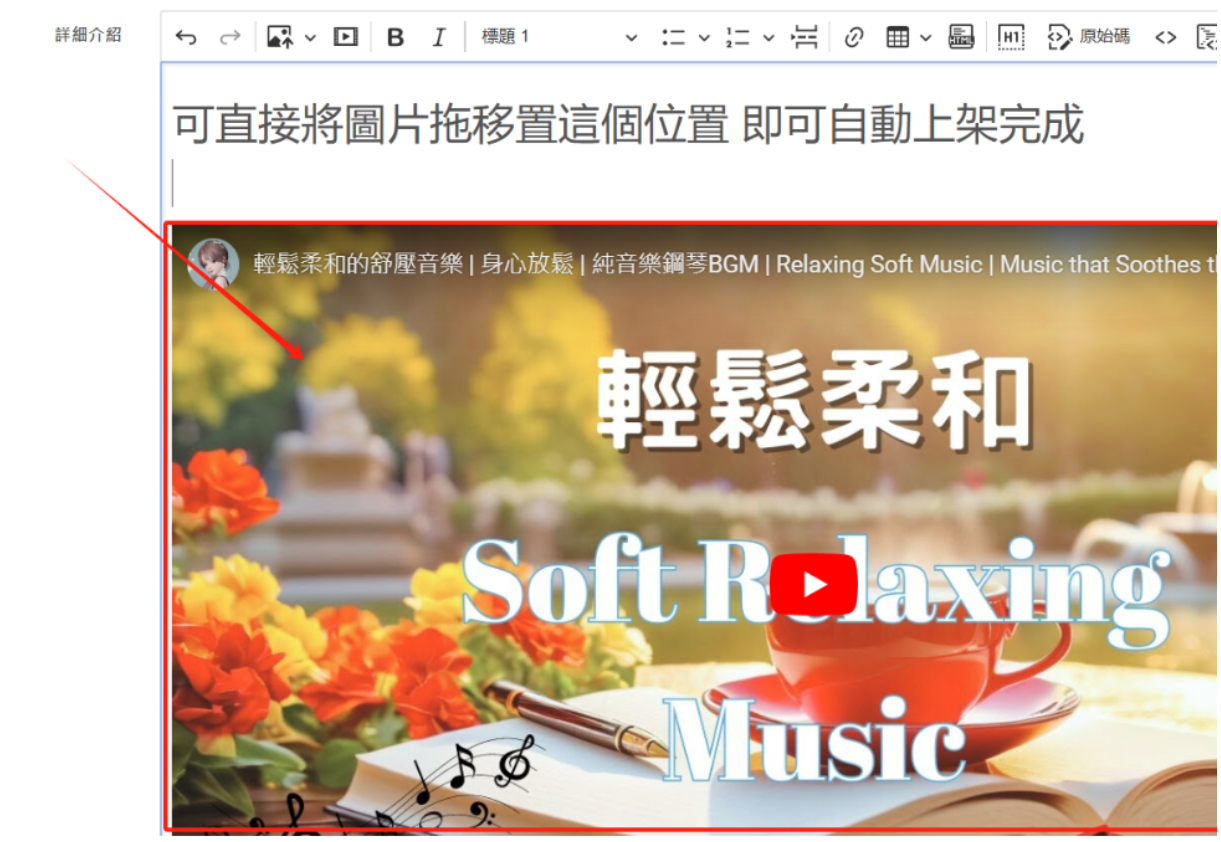
(2.4), click to insert video, paste the path of YOUTUBE into the video URL and press accept (as shown below) to complete the video exposure.
This is the video path of YOUTUBE

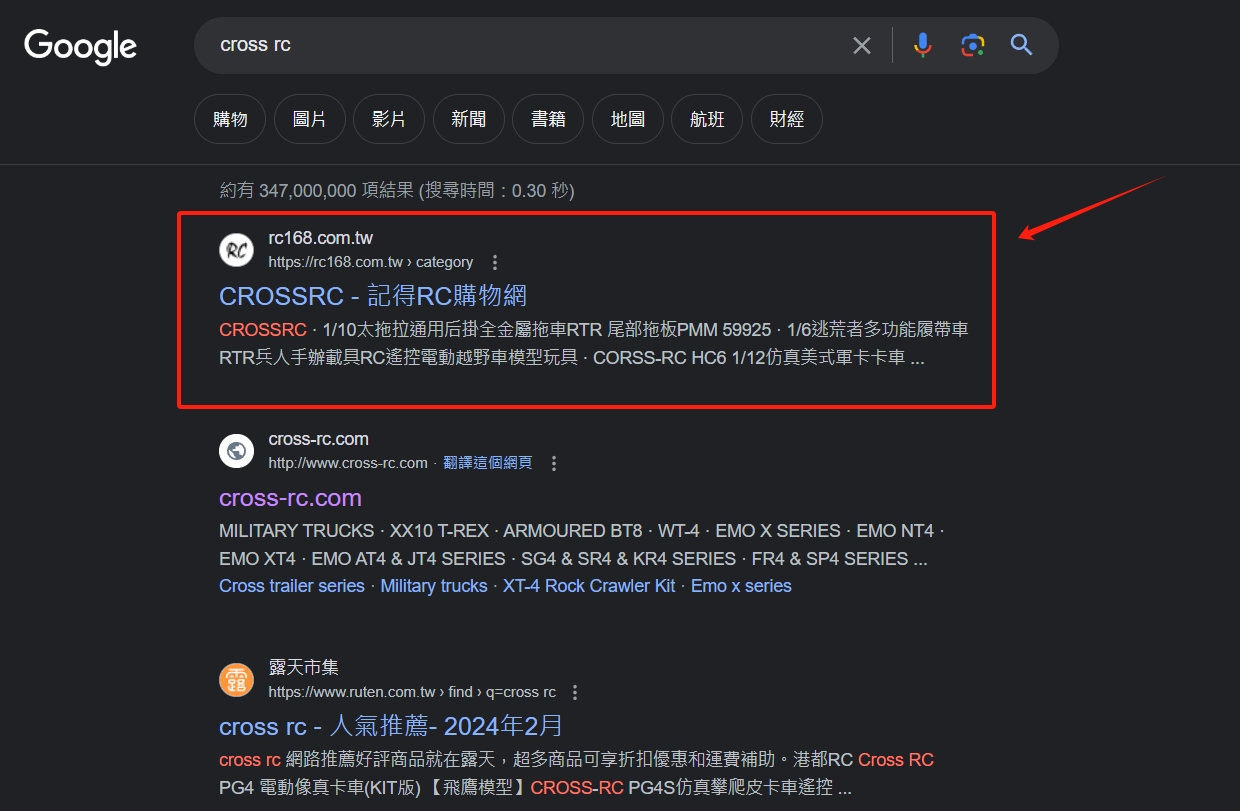
(2.5). After editing the basic information, be sure to click number 5 in the above picture, "Ai intelligently automatically generates SEO"With just one click, the Ai system will automatically determine and select the keywords and tags that best comply with the GOOGLE mechanism sorting,The picture below shows the GOOGLE search results. The ranking is the first place in the search, surpassing the original and open-air rankings.
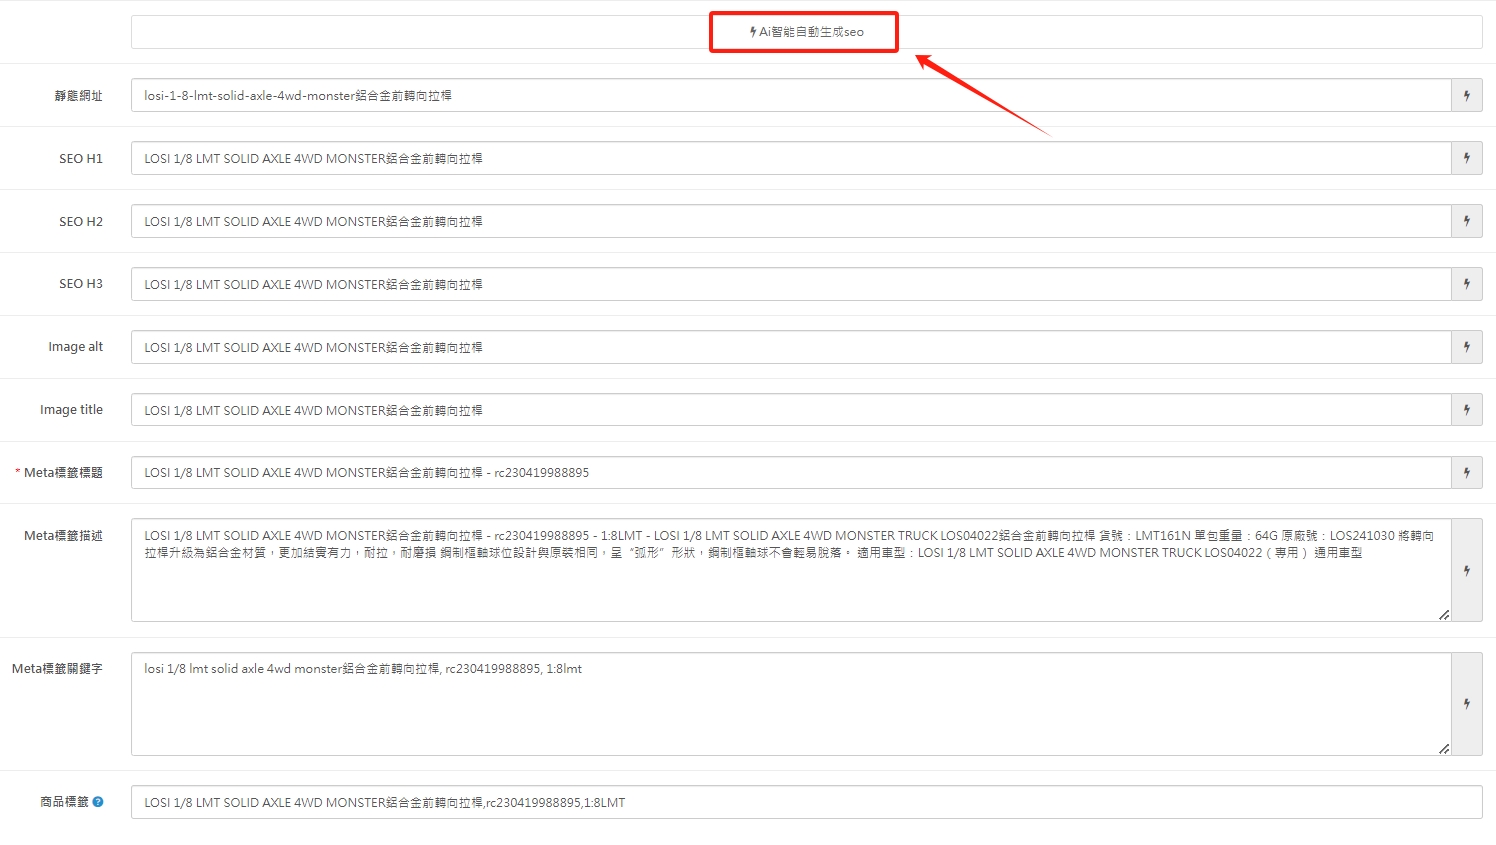
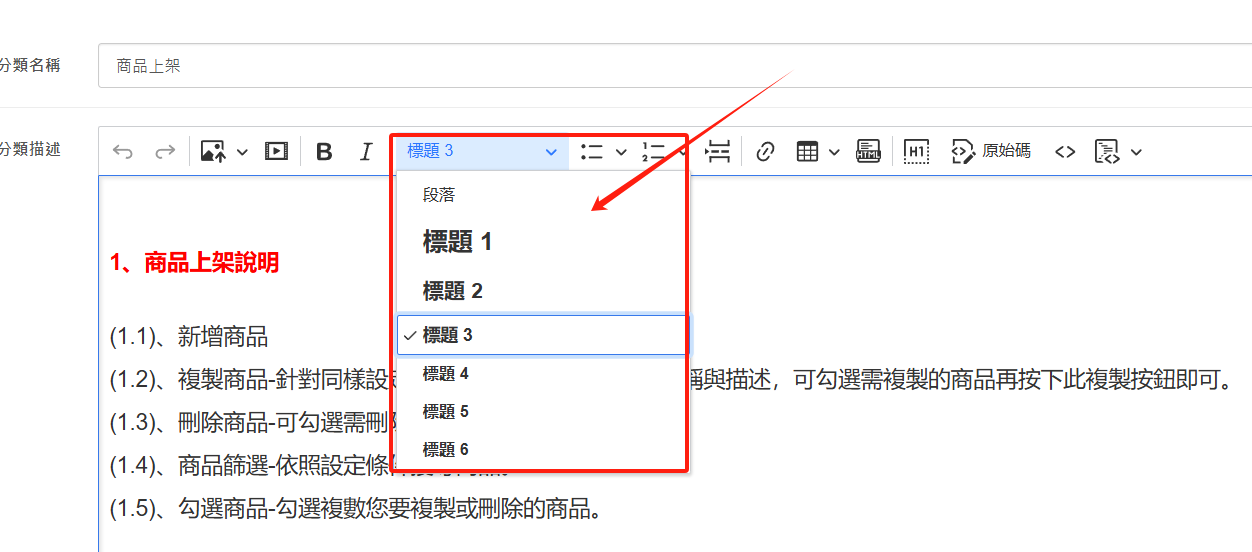
(2.6), the red box can modify the text size. If you want to change the font, color, and symbols, you can paste the text directly after editing it in WORD.
(2.7),GOOGLE keyword input cross rc search results, the ranking is the first search, surpassing the brand original factory and open-air auctionSort.
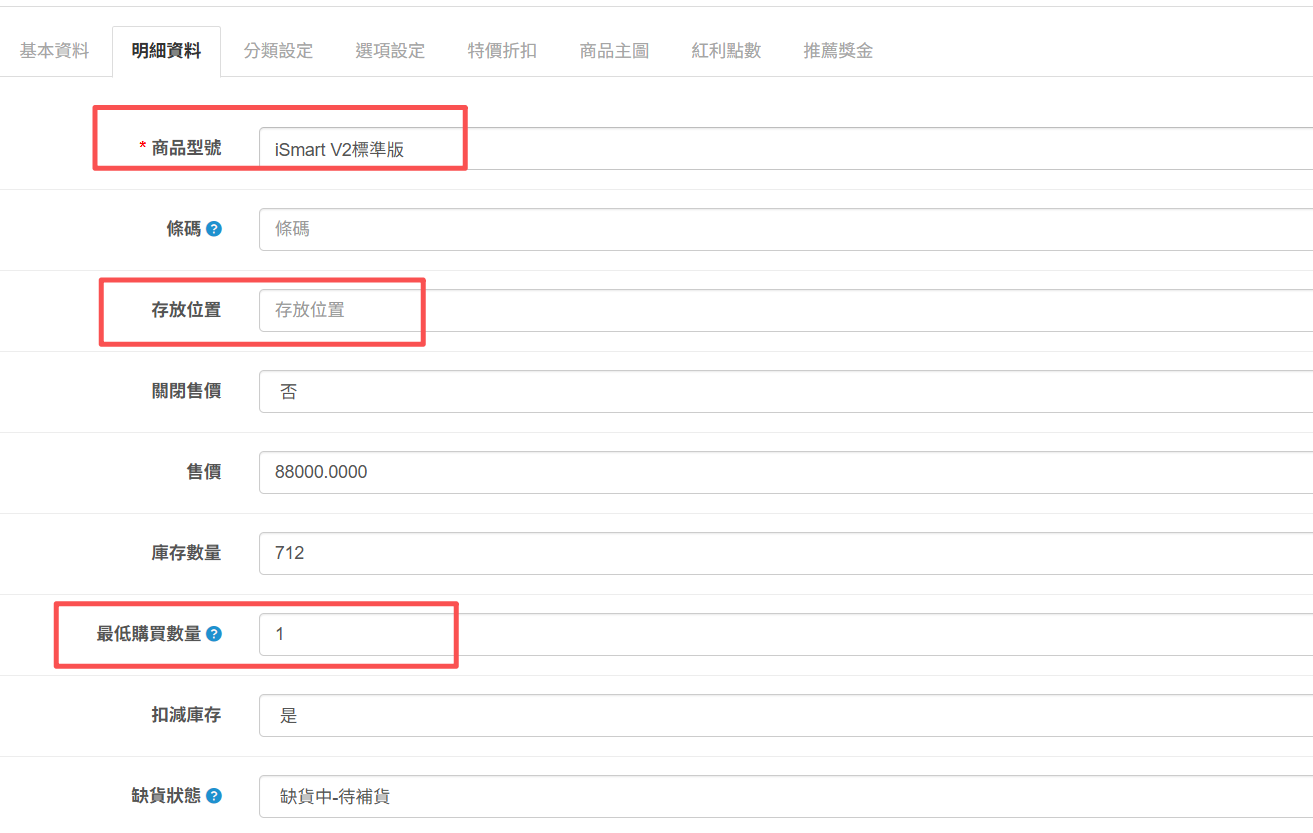
3. Product listing - detailed information
(3.1), the product model can be filled in the same as the barcode or the model number,Or fill in the keywords you want to be exposed1-2Group.
(3.2). The storage location is convenient for multiple warehouses and multiple stores. It reminds you where the products are placed, and you can also paste the source path of the products.
(3.3), the minimum purchase quantity is for low-priced products or for sales of packaged products, and the price of a single piece increases the incentive to browse.
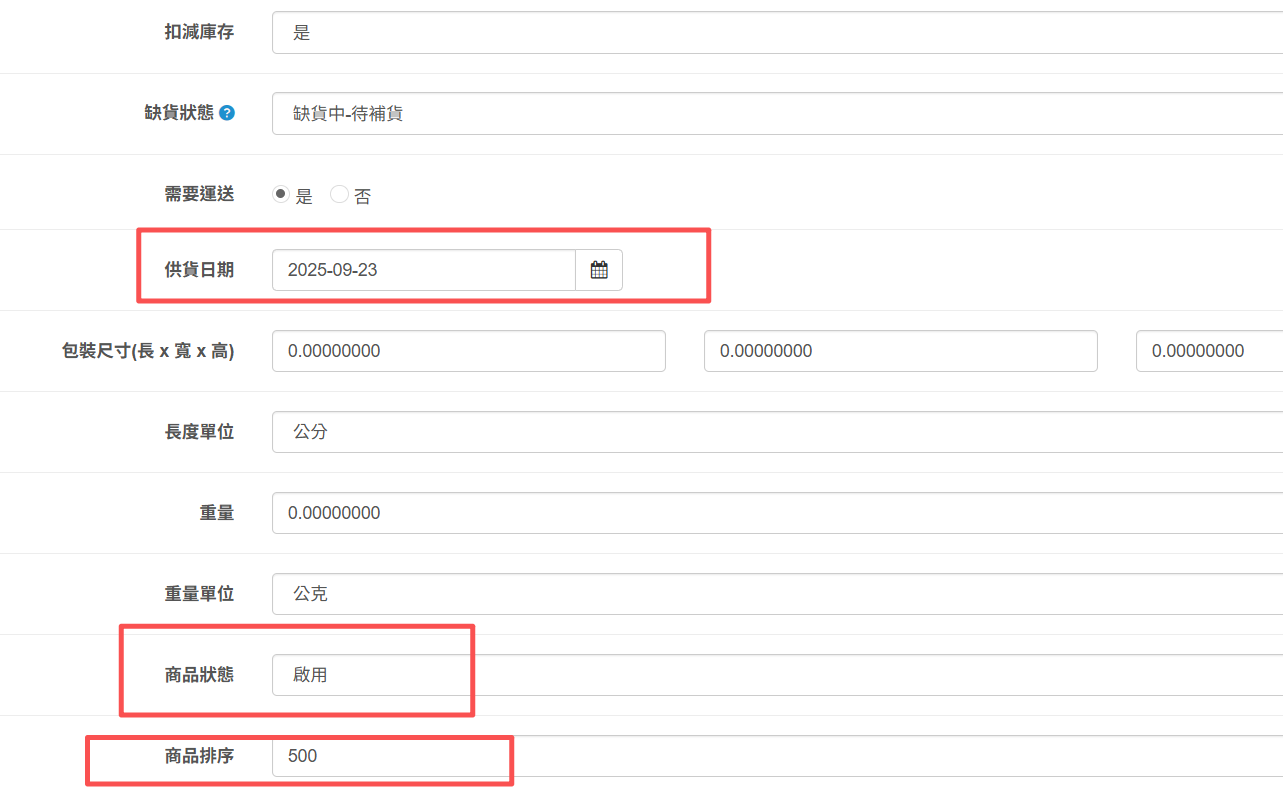
(3.4), delivery date-Put it on the shelf first and then expose it, select the time to be exposed, and the frontend will be exposed immediately
(3.5), product status-Enable or close. After closing, the front desk will be removed and cannot be queried.
(3.6), product sorting-The larger numbers are at the back, and the smaller numbers are at the front. The same numbers are in the order of listing, with the new ones at the front and the old ones at the back.
4. Product listing - category setting
(4.1), brand-after setting, you can click on the brand when browsing the products in the front desk, and all the products of the brand will appear in the front desk.
(4.2), product classification - a single product can be exposed in different categories, eliminating the time of repeated listing.
(4.3), related products - will appear at the bottom of the product browsing screen on the front desk. Related products will facilitate consumers to make additional purchases, such as toilet paper products. Related products appearing below are toilet paper storage boxes, or similar names on other shopping websites (products that other people also browse)... and other applications.

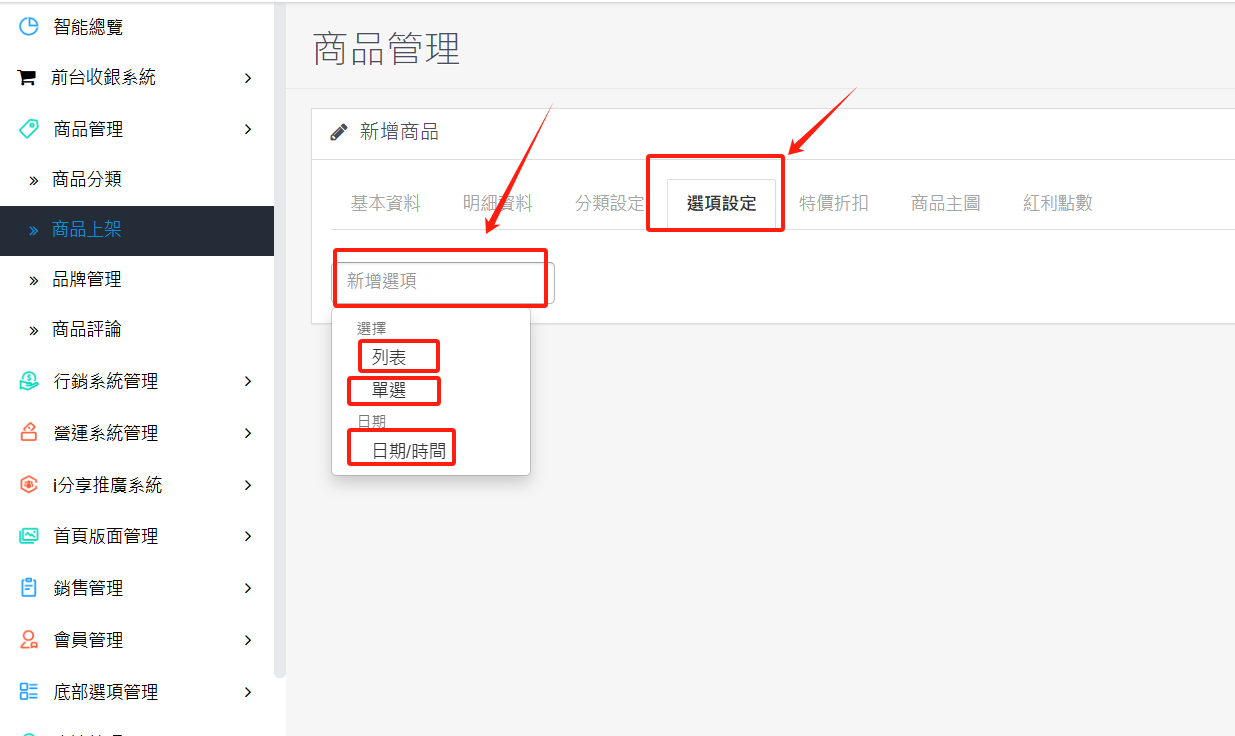
5. Product listing - option settings
(5.1). Click the white box of the new option, and the following three options will pop up - (1) list, (2) radio selection, (3) date/time.
(5.2), list/radio selection setting instructions:
(5.2.1). Display name: the option name in the foreground
(5.2.2). Options are sorted in the order of options displayed in the foreground, with smaller numbers at the top and larger numbers at the bottom.
(5.2.3). Name the options, such as: color, size, package group...etc.
(5.2.4). The inventory quantity will be automatically deducted after placing the order. If it is a pre-order, there is no need to deduct the inventory. Just select "No" for the inventory deduction next to it.
(5.2.5). Select the amount you want to sell, you can set it without selecting different amounts.
(5.2.6). Upload pictures corresponding to the options to facilitate identification by front-end consumers.
(5.2.7). Delete option
(5.2.8). New options
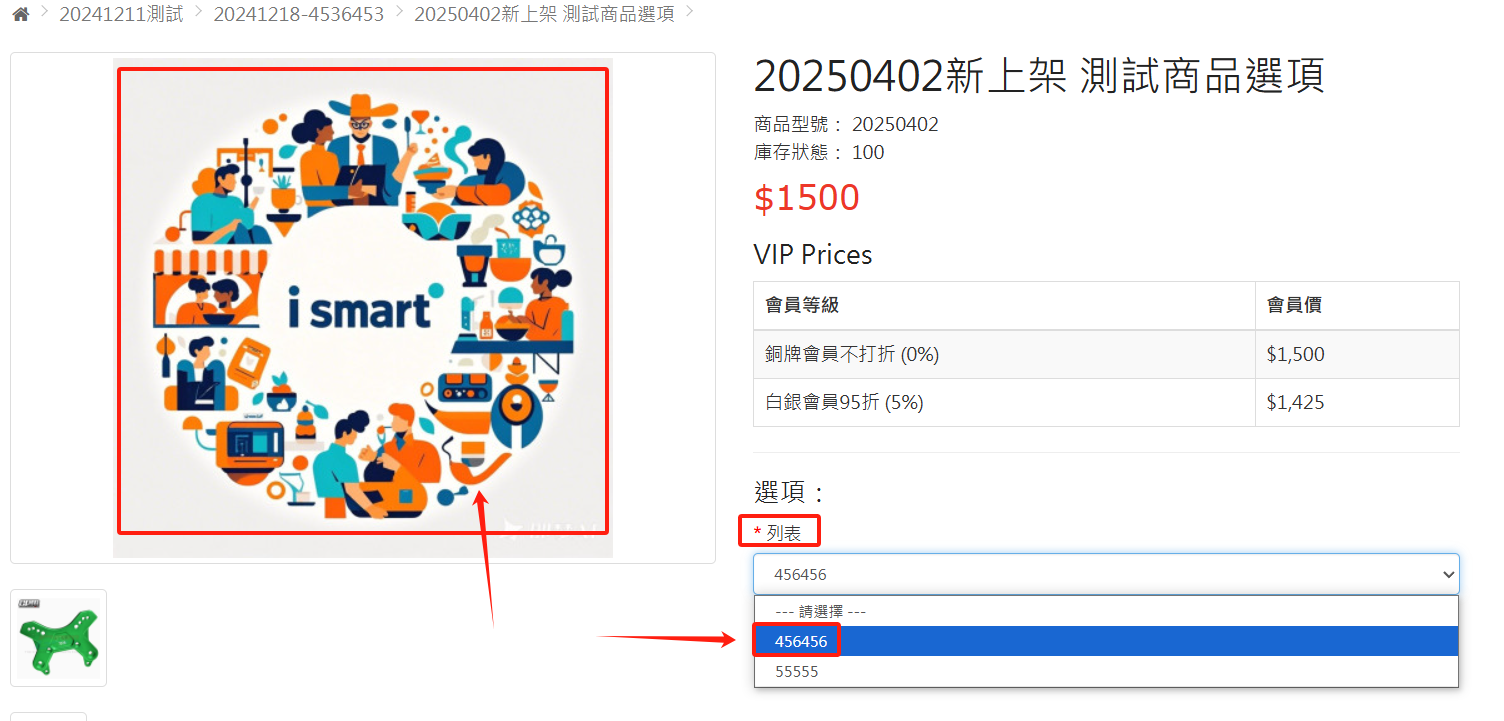
>>List front-end presentation style - the red box on the left corresponds to the uploaded image on the right
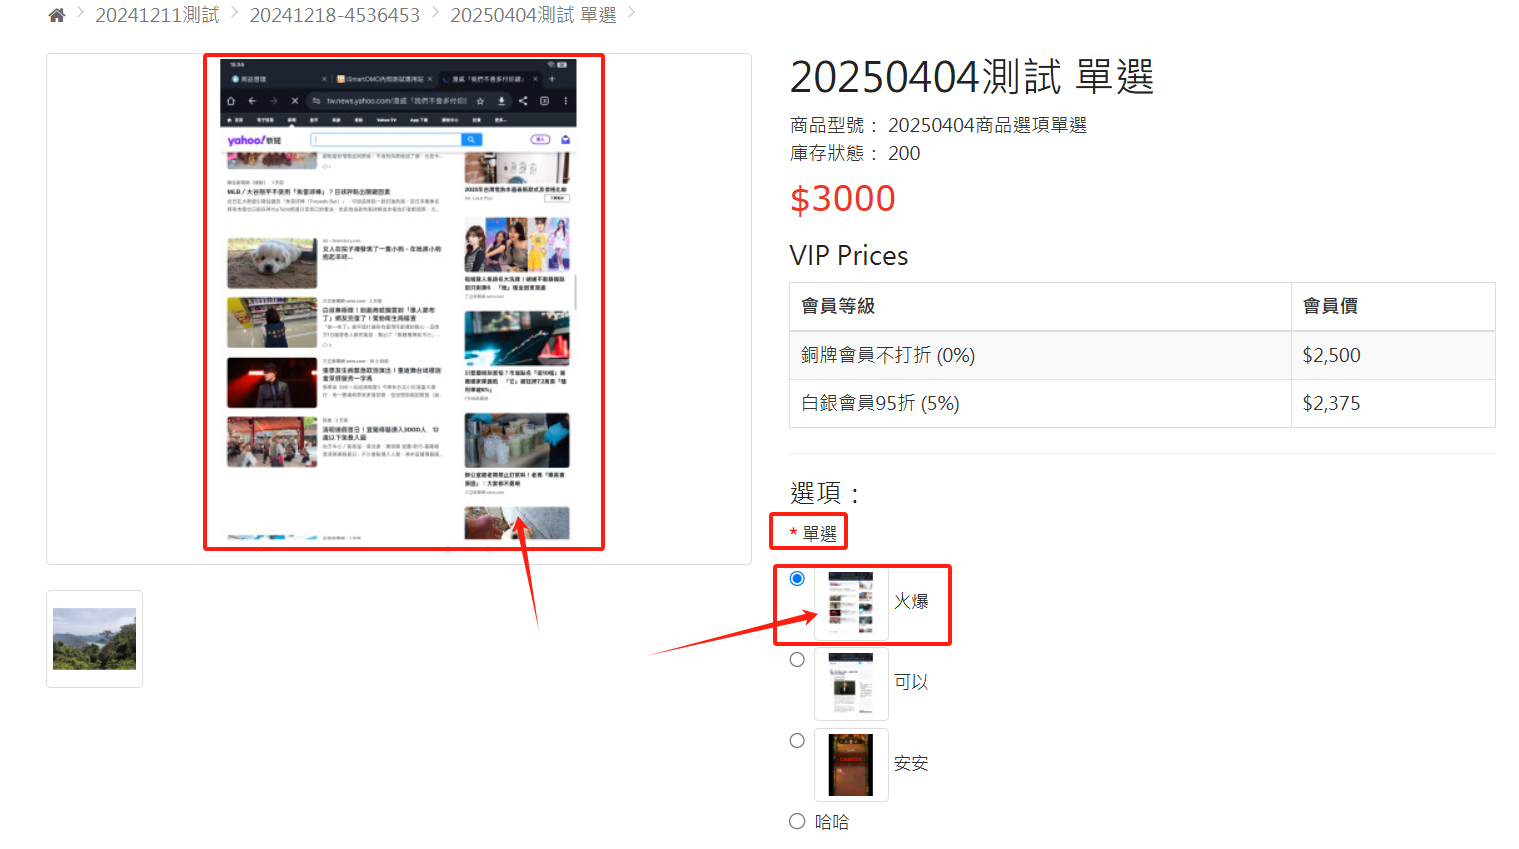
>>Single-select front-end rendering style - the red box on the left corresponds to the uploaded image on the right
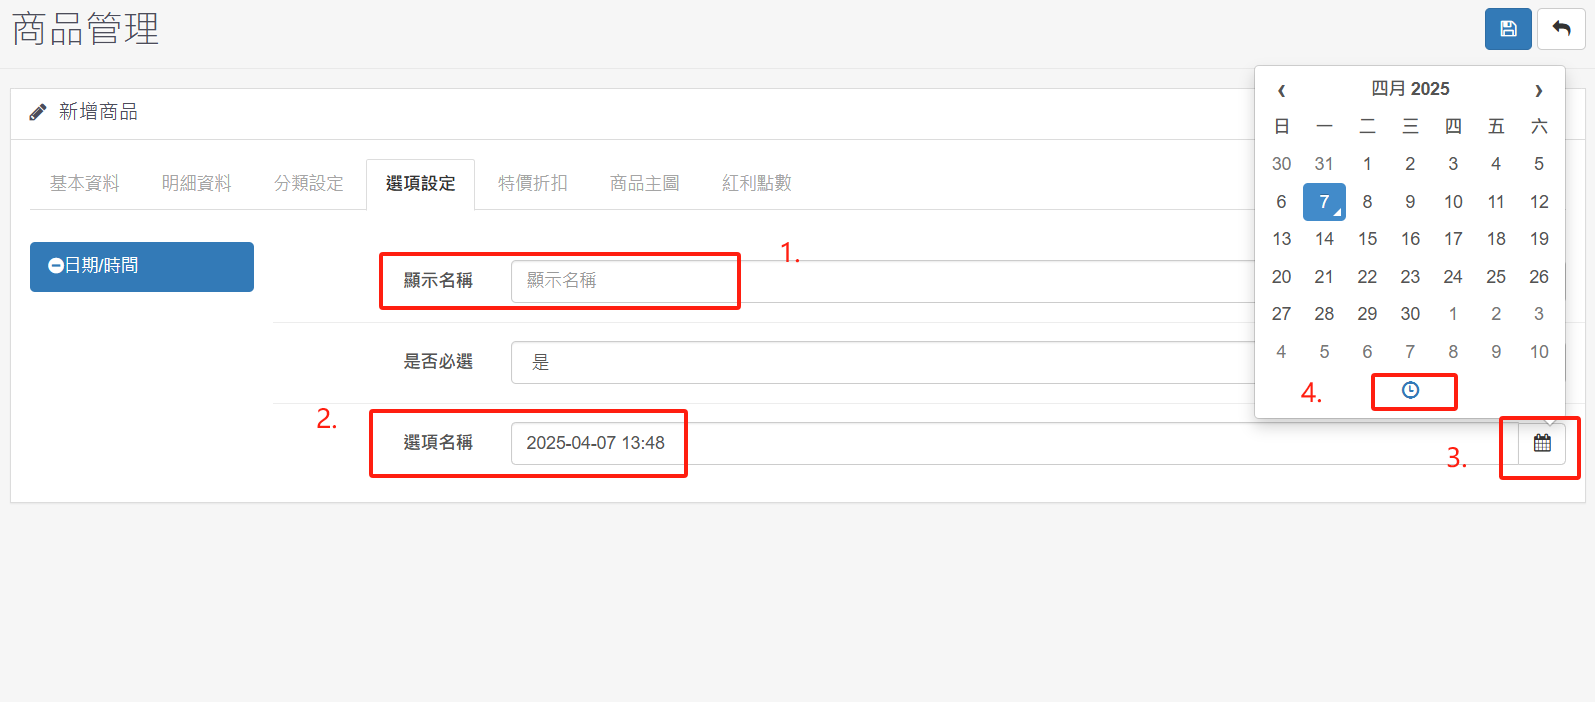
(5.3), date/time setting instructions:
(5.2.1). Display name: the option name in the front desk
(5.2.2). The option name is the date, and you can choose the time when the reservation is open.
(5.2.3-4). The option date and time can be set in detail to facilitate front desk customers to reserve service time. The inventory is the "inventory quantity" deducted from the detailed information.
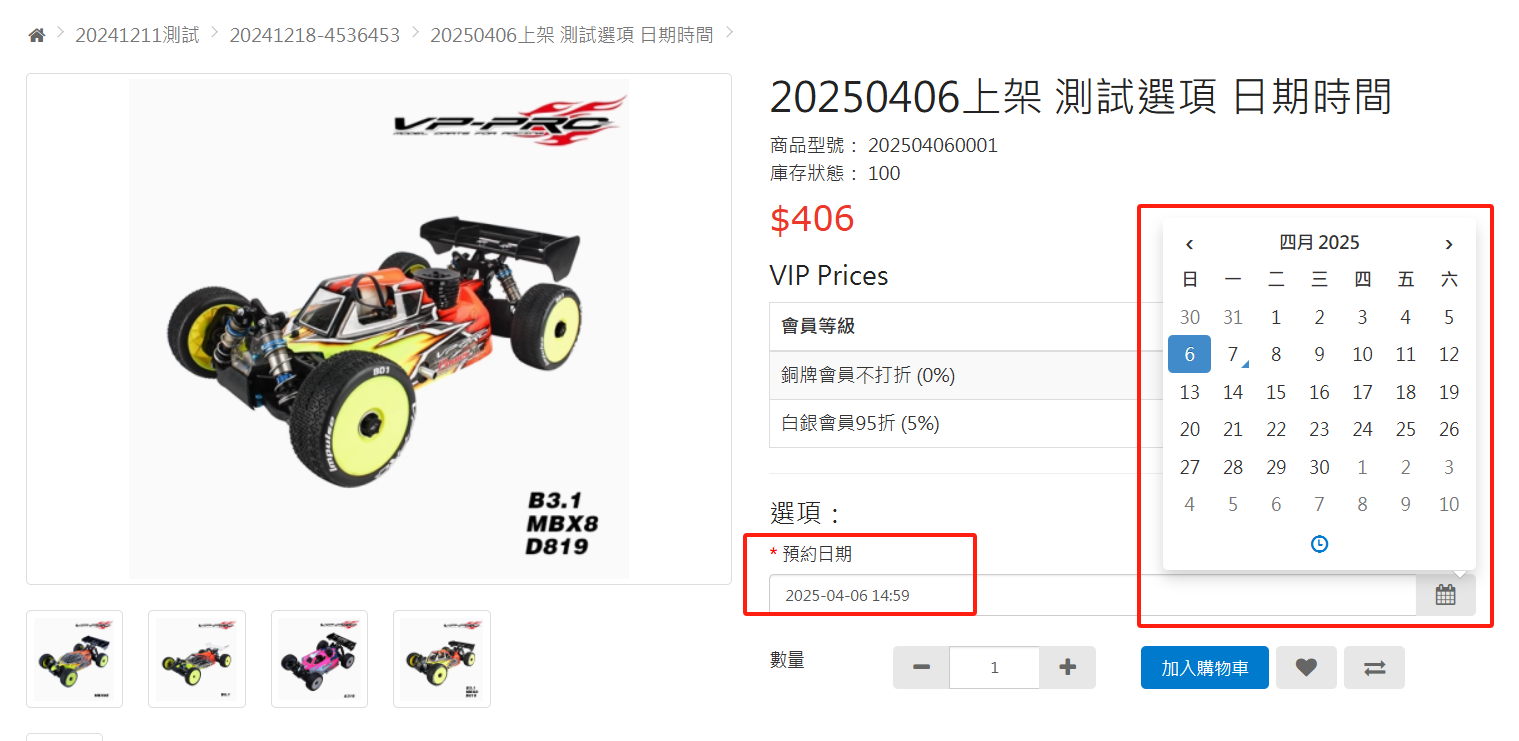
>>Date/time front-end presentation style - the red box on the left corresponds to the uploaded image on the right
 (6.1), different special offers can be given to different member groups.
 (6.2). The priority order is that the styles presented at the front desk are sorted from top to bottom, with smaller numbers at the top and larger numbers at the bottom.
(6.3). The discount amount refers to how much money will be deducted from the final selling price you want, such as the original price1000yuan, the final selling price of Hope after special discount is600yuan, fill in the discount amount field400yuan, and so on.
(6.4). The start date must be filled in. If the end date is not filled in, it will continue.

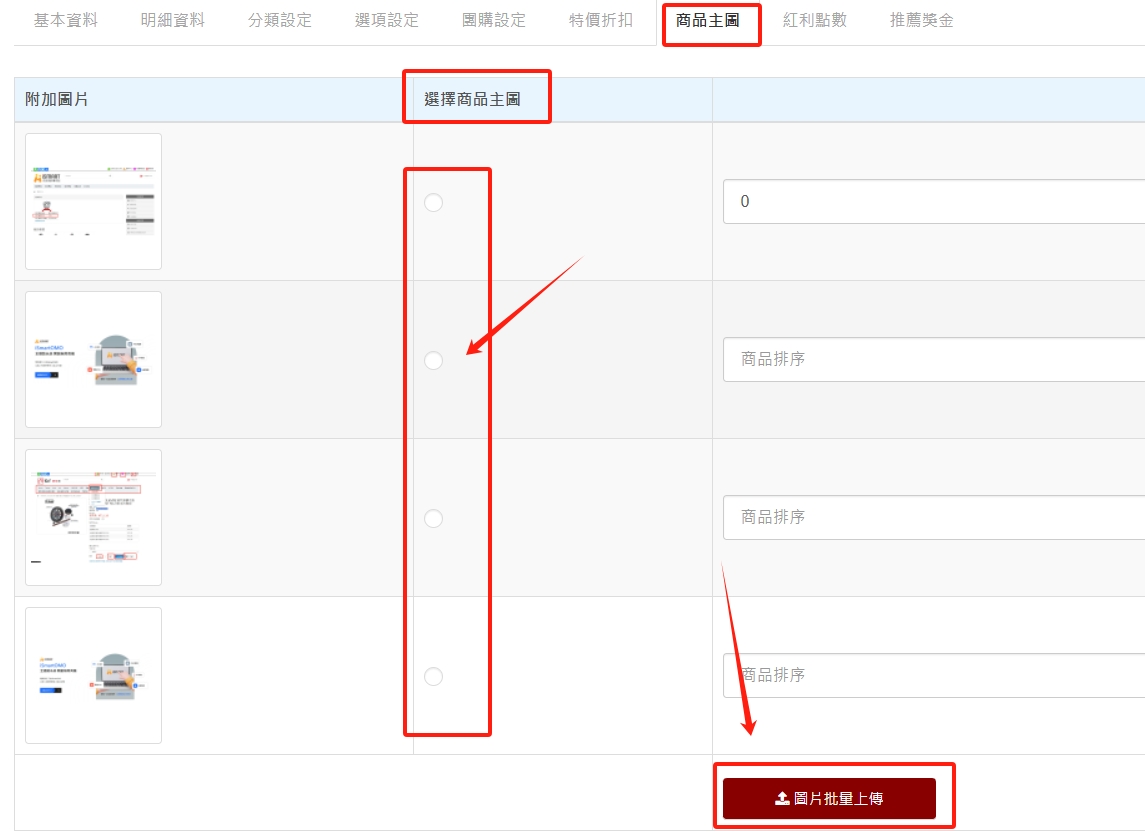
7. Product launch - product main image
(7.1). First, click on the image batch upload. After selecting the image to be uploaded, press Open and the upload will be completed automatically.
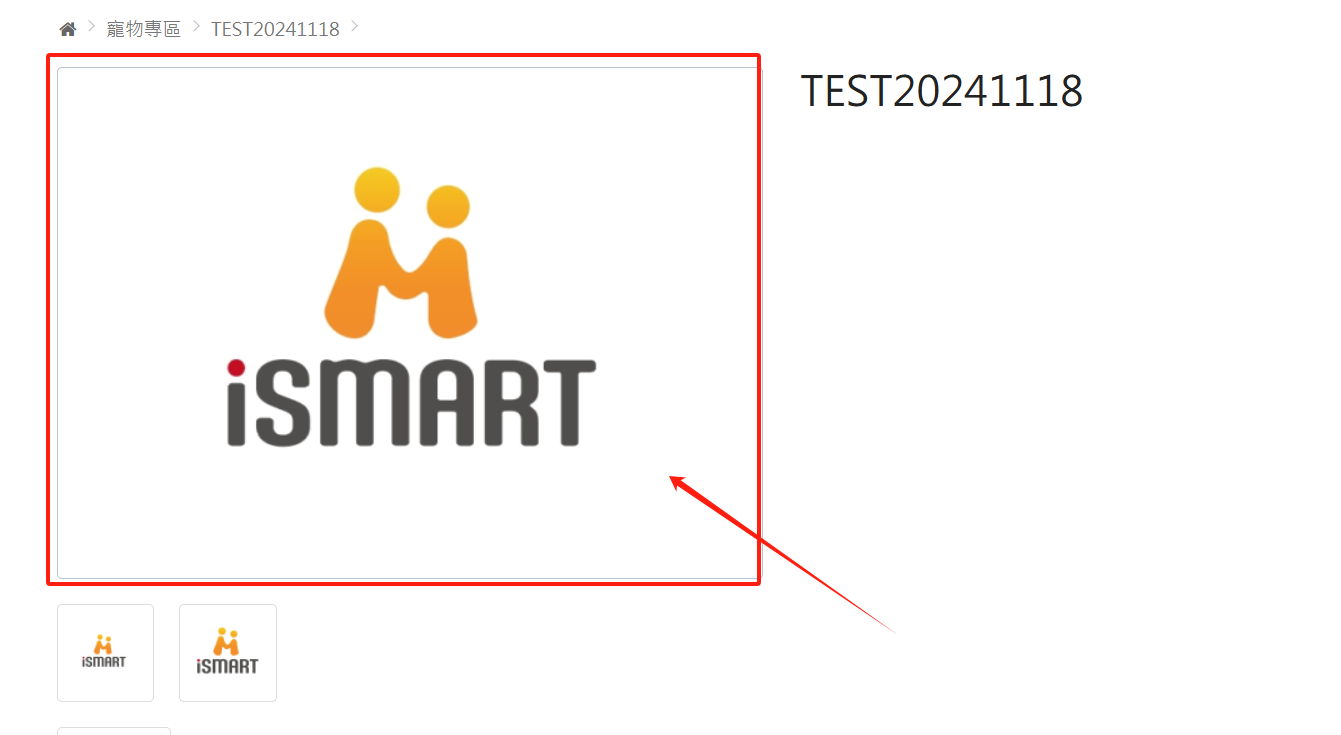
(7.2) Remember to choose which picture will be the main product picture at the front desk.
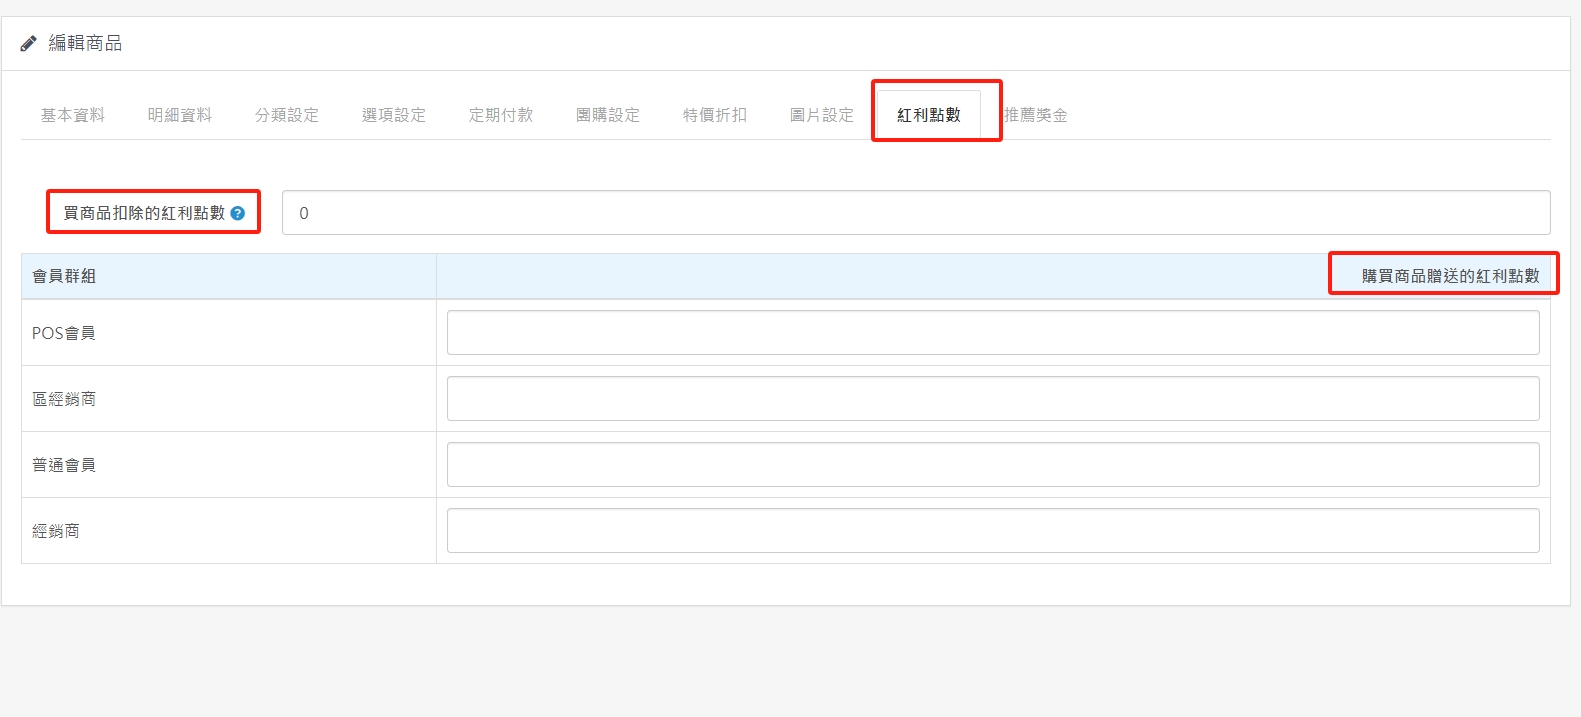
8. Product launch - bonus points
(8.1). Bonus points deducted from purchasing goods - meaning that the product can be traded with bonus points. If 1000 points are set, the other party can directly complete the transaction with these points without paying additional cash. If not, enter 0 or a space and it will not start.
(8.2). Bonus points given when purchasing goods - bonus points given after purchasing goods. If not needed, enter 0 or a space and it will not start.
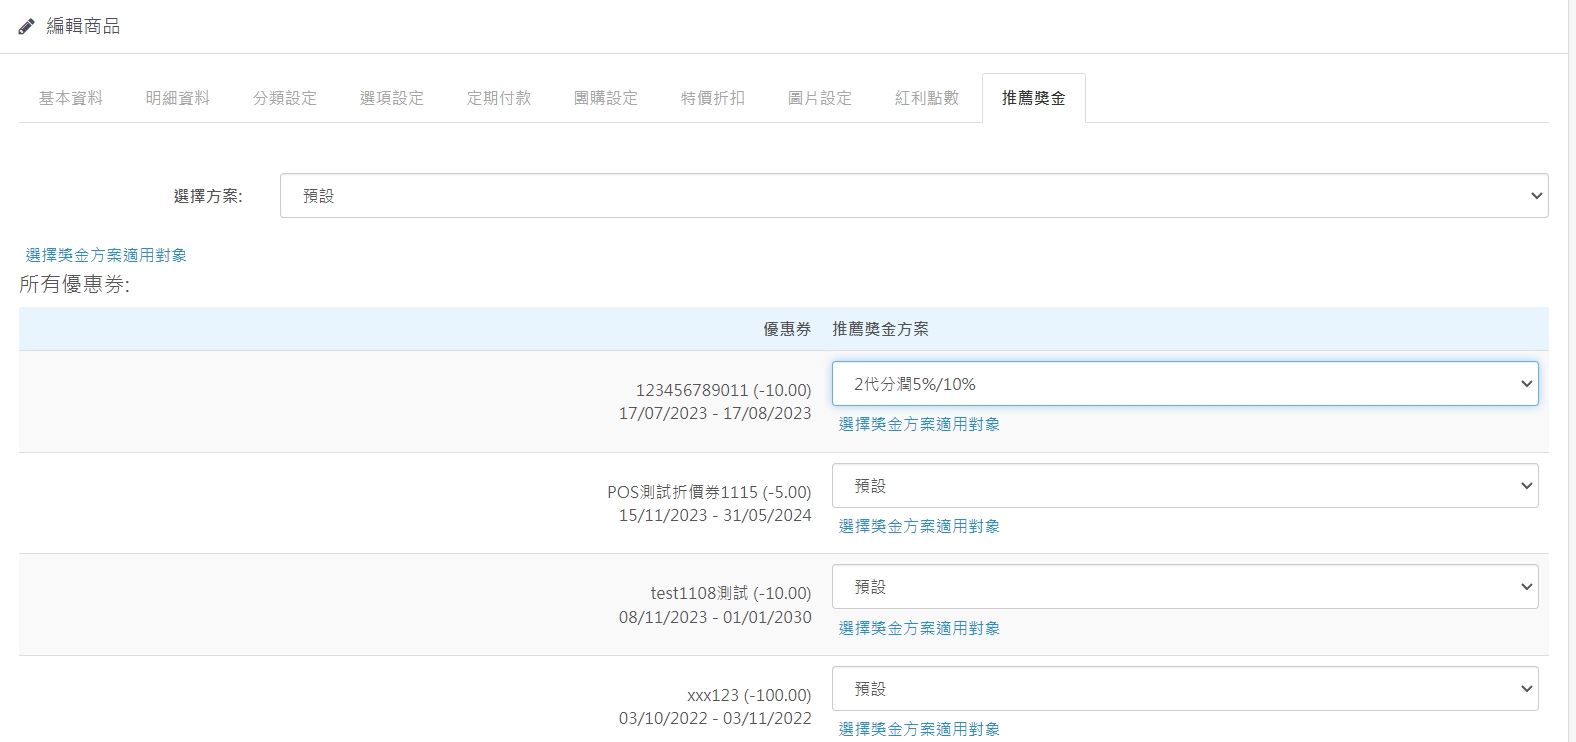
9. Product listing - recommendation bonus
(9.1). Provide different recommendation bonuses for products.
(9.2). The default means that if no recommendation bonus is set at the beginning, it will not be activated. If there is a setting and the default is selected, the system will always use this setting value.
There are no products to list in this category.